**Bon à savoir :** Sur la plateforme, le terme "Niveau hiérarchique" est parfois employé pour désigner une organisation.
--- ### **Accéder aux organisations** Pour accéder aux organisations : 1. Allez dans **Gestion > Utilisateurs**. 2. Les **organisations** sont présentées dans l'arborescence : vous pouvez créer **autant de niveaux** que vous le souhaitez dans cette arborescence.Une arborescence complexe peut ralentir le chargement de certaines pages ou l'exécution de certaines tâches.
3. Pour **créer**, **supprimer**, **éditer **ou **déplacer** une organisation, cliquez sur le bouton correspondant. 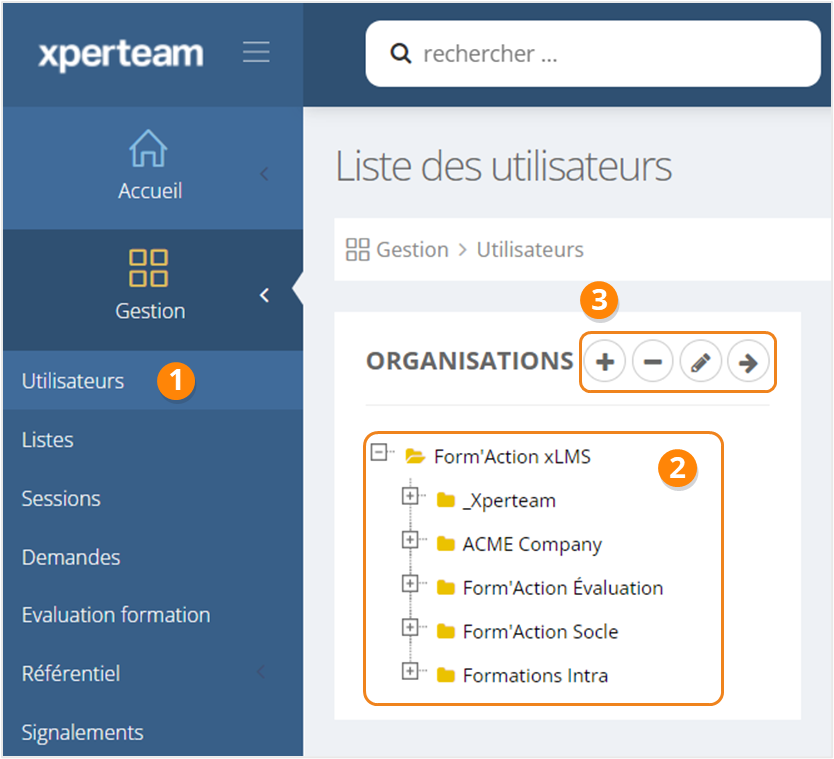 --- ### **Créer une organisation** Pour créer une organisation : 1. Sélectionnez l'**organisation mère** de celle que vous souhaitez créer. 2. Cliquez sur le **bouton \[+\]**. ####  #### **Informations générales** ##### **Informations** Sur la page **Informations générales > Informations**, vous pouvez : 1. **Activer** / **Désactiver** l'organisation.Les utilisateurs appartenant à une organisation désactivée **ne peuvent pas se connecter**.
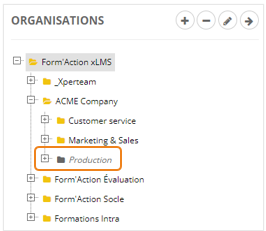
Une organisation désactivée se repère par sa couleur grise et l'écriture en italique.
[](https://documentation.xperteam.net/uploads/images/gallery/2024-04/BUximage.png) 2. **Nommer** l'organisation **\[obligatoire\]**. 3. Renseigner un **identifiant externe**.L'identifiant externe d'une organisation doit être **unique**.
Cet identifiant externe sera nécessaire pour un import d'organisations ou un import d'utilisateurs.
4. Ajouter un **code établissement**. 5. Préciser son **budget**. 6. Sélectionner la **langue par défaut**. Celle-ci sera attribuée à tout utilisateur nouvellement créé dans cette organisation.Il est possible de modifier ensuite la langue d'un utilisateur depuis sa fiche apprenant.
7. Ajouter une **description**. Celle-ci ne sera visible qu'en back-office. 8. Renseigner l'**adresse complète** de l'organisation. [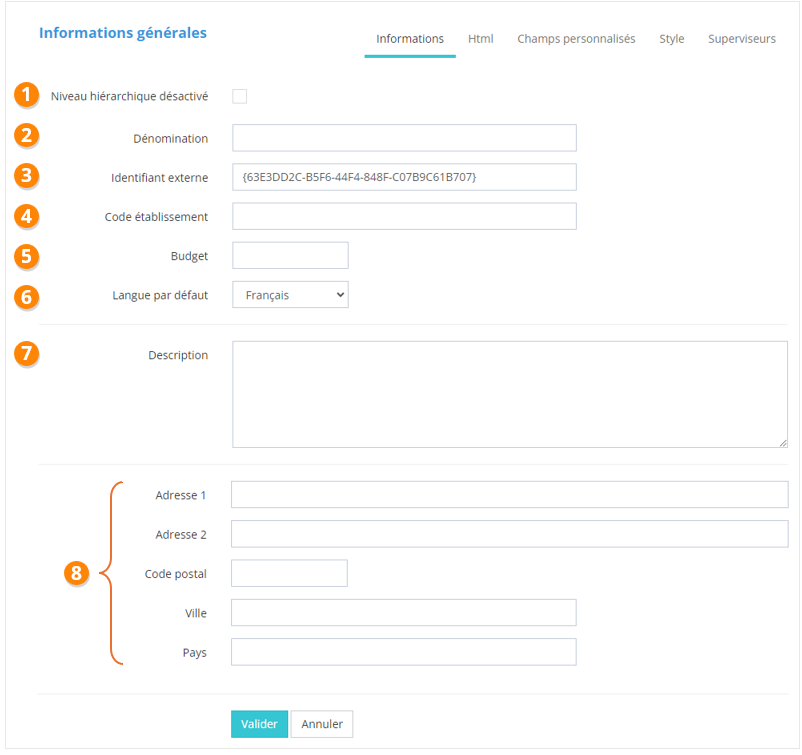](https://documentation.xperteam.net/uploads/images/gallery/2024-04/19nimage.png) ##### **Html** Sur la page **Informations générales > Html**, vous pouvez décrire votre organisation à l'aide de deux textes libres. Ces descriptions apparaîtront en front-office si vous utilisez le widget 0301 - Champ html de l'organisation (pour plus d'informations concernant les widgets, se référer au chapitre correspondant). Pour chaque onglet de texte libre, vous pouvez : 1. décider s'il doit être **identiques ou non à celui de l'organisation mère** ; Si vous cochez cette case, l'éditeur de texte sera désactivé. 2. formater votre texte dans l'éditeur HTML 3. le calibrer ou non avec un **gabarit Qualiopi**. [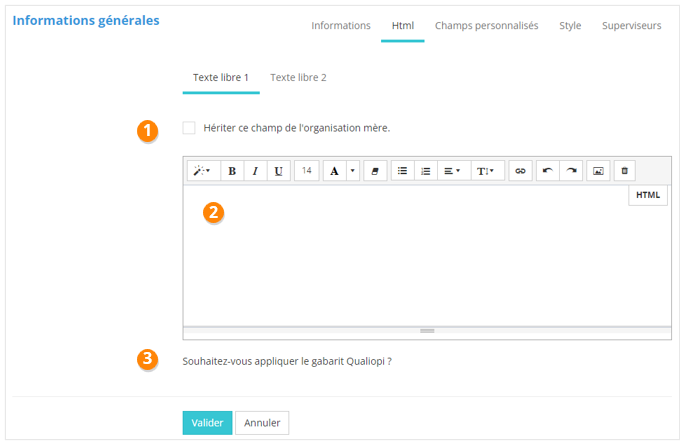](https://documentation.xperteam.net/uploads/images/gallery/2024-04/eopimage.png) ##### **Champs personnalisés** Vous pouvez ajouter jusqu'à **10 champs personnalisés** pour qualifier vos organisations. [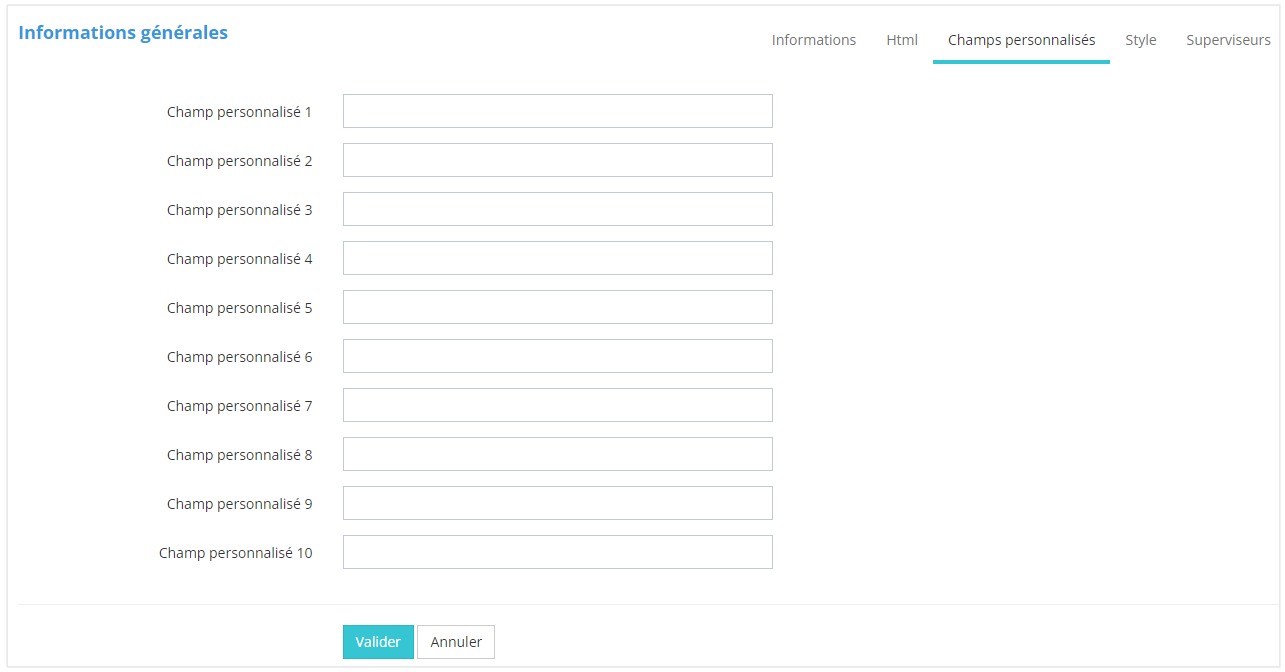](https://documentation.xperteam.net/uploads/images/gallery/2024-04/Xzlimage.png)Ces champs personnalisés peuvent être utilisés lors d'une recherche d'organisation avec des filtres de recherche.
##### **Style**De façon générique, il existe un seul style pour les organisations, nommé Default.
Lorsque vous possédez d'autres styles, vous pouvez : 1. **choisir le style** de l'organisation dans le menu déroulant; 2. décider d'**appliquer ou non ce même style aux organisations enfants** de celle que vous êtes en train de créer / éditer.[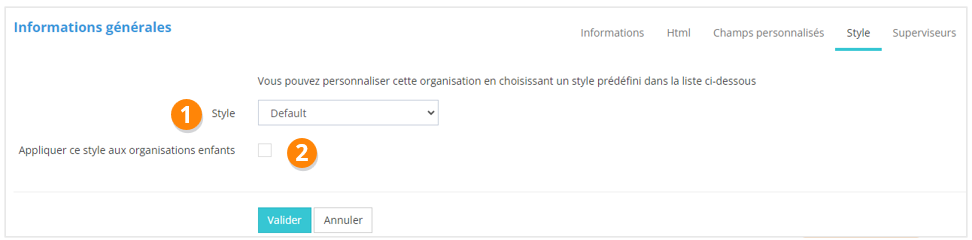](https://documentation.xperteam.net/uploads/images/gallery/2024-04/gJDimage.png) ##### **Superviseurs** Pour chaque organisation, vous pouvez définir des superviseurs. Ceux-ci auront accès au suivi des formations pour tous les utilisateurs de l'organisation, notamment via la Page Superviseurs à ajouter au front-office via le front-designer.Pour plus d'informations, se référer aux chapitres **Personnalisation du front-office** et **Page Superviseurs**.
#### **Cours et Parcours** Pour plus d'informations sur cet onglet, se référer au chapitre Affecter des cours et des parcours à une organisation.